
Safe Area Generator for Reels & TikTok
Generate safe areas for Reels and TikTok before you export. Keep faces, captions, and logos clear of platform UI with simple margin rules and a browser crop preview.
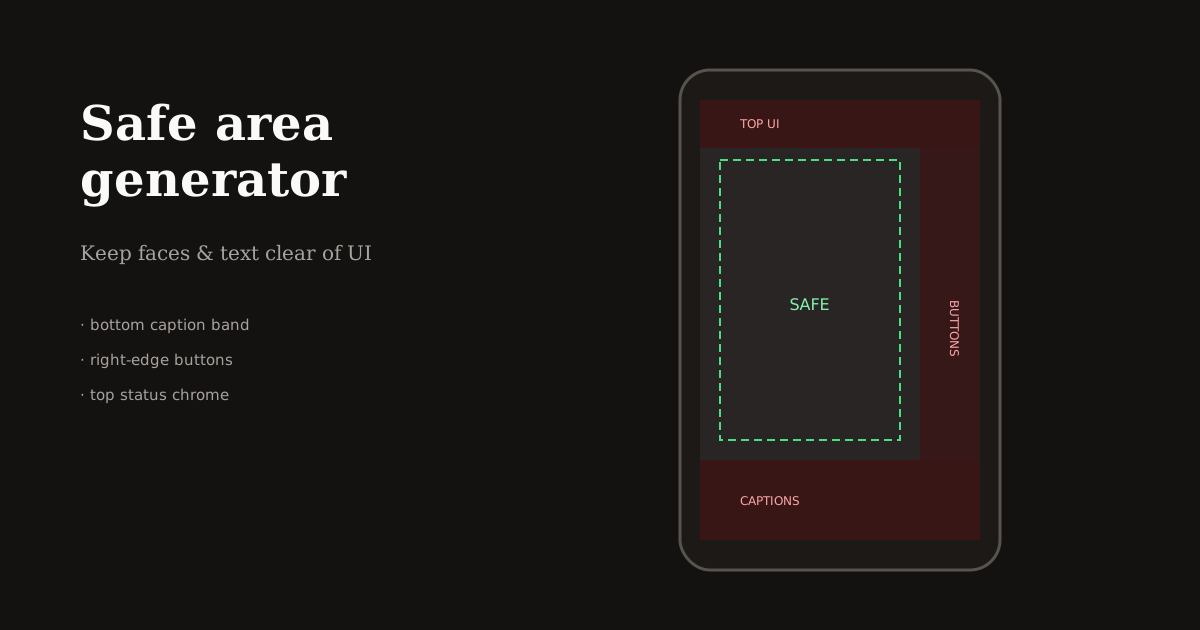
Platform UI is part of the frame whether you design for it or not. A safe-area pass before export is the fastest way to stop captions, buttons, and stickers from covering your subject.
What a safe area is (and why generators help)
A safe area is the region of a 9:16 frame that stays readable after Instagram, TikTok, or Shorts draw their interface on top of your video. Everything critical — faces, logos, prices, CTAs — should live inside that region.
You do not need a separate desktop app to “generate” safe areas. In practice, you apply margin rules while cropping: leave padding at the bottom, sides, and top, then verify in a phone-shaped preview.
Reels Editor’s Resize Video tool is the generator workflow: set 1080×1920, drag the subject into the safe center, and export only when UI collision risk is gone.
Margin rules that work across platforms
Bottom: keep roughly the lower 15–20% free of essential burned-in text. Platform captions and audio labels live here.
Right edge (especially TikTok): keep ~10% clear of logos and key products so like/comment/share stacks do not cover branding.
Top: leave a small buffer for status bars and navigation. Center: place faces in the middle band so headroom survives recompression and slight auto-reframing.
These percentages are creative guidelines, not legal specs. Always preview on a real phone when a campaign depends on a logo or price callout.
Safe-area workflow in Reels Editor
Upload your clip to Resize Video and select the Reels & Stories preset. Scale up only enough to fill 9:16 without cutting eyes or product labels.
Mentally overlay three zones: bottom caption bar, right button stack, top chrome. Drag until the subject clears all three. If you add a logo next, place it inside the remaining safe pocket — usually upper-left or mid-left, not the corners TikTok owns.
Export the MP4, then spot-check the first three seconds and any on-screen text moments. Safe-area mistakes almost always show up in those frames.
Common safe-area failures
Burned-in captions sitting in the same band as Instagram’s caption field. Lower-third names colliding with TikTok usernames. Corner watermarks under the share button. Talking-head crops so tight that a slight platform pad clips the chin.
Fix by giving the subject air, moving text up, and treating UI as a design constraint — not an afterthought after upload.
When you repurpose the same master to Stories stickers or Shorts titles, re-check margins. Interactive stickers change what “safe” means even when pixels stay 1080×1920.
Frequently asked questions
- Is there a safe area generator for Reels?
- Yes in workflow terms: crop to 1080×1920, apply bottom/side/top margins, and preview like a phone screen. Resize Video in Reels Editor is built for that pass.
- What is the TikTok safe zone?
- Keep critical content out of the right-edge button stack and the lower caption band. Center faces in the middle of the 9:16 frame.
- Do safe areas change the export size?
- No. You still export 9:16 (usually 1080×1920). Safe areas change composition inside that frame, not the pixel dimensions.