
How to Resize a Video for Instagram Reels
Resize a video for Instagram Reels in the browser: pick 1080×1920 (9:16), reframe any source, skip black bars, then export MP4 before you upload.
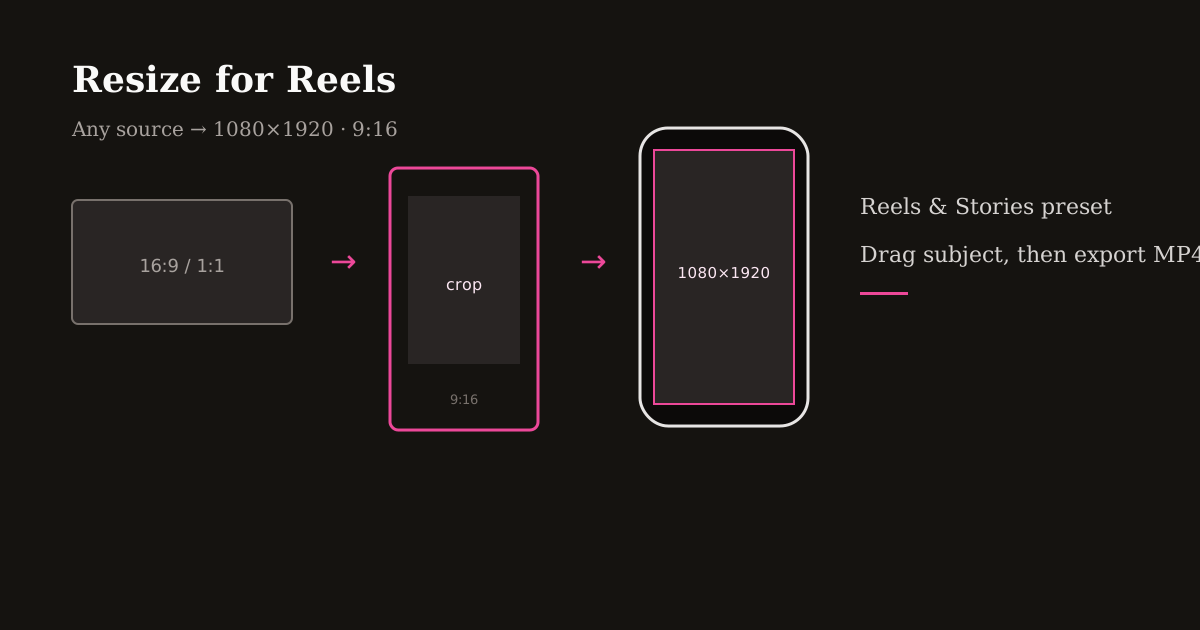
Instagram Reels play full-screen on a phone. If you upload landscape, square, or a 4:5 feed clip as-is, Instagram will crop the center or letterbox the sides — and it will not ask which face or product to keep.
Resizing first gives you that decision. This walkthrough is the action version of a size chart: open Resize Video, lock 1080×1920, drag the subject, export MP4. Specs live in the dimensions guide; here you actually change the file.
Quick size reference
| Platform | Format | Size | Ratio | Notes |
|---|---|---|---|---|
| Instagram Reels | Target export | 1080×1920 | 9:16 | Full-screen Reels playback |
| Stories | 1080×1920 | 9:16 | Same canvas — reuse the master | |
| Portrait feed (not a Reel) | 1080×1350 | 4:5 | Do not stretch this into 9:16 |
What size to resize a video for Instagram Reels
Use 1080×1920 pixels at 9:16. That is the Reels & Stories preset in Reels Editor and the size Instagram expects for immersive playback.
You do not need a different pixel size for Stories. One vertical master covers both. 4:5 (1080×1350) is for portrait feed posts, not full-screen Reels — stretching it taller smears the image.
If you only need the spec sheet, see Instagram Reel dimensions. If the clip is already 16:9 landscape, the dedicated 16:9-to-9:16 guide goes deeper on composition; the steps below still apply to square, 4:3, 4:5, and vertical sources that are too small or off-center.
How to resize a video for Instagram Reels in the browser
Open Resize Video and upload MP4 or MOV. Processing stays on your device — no account and no cloud queue.
Choose the Reels & Stories preset (1080×1920) or type those numbers as custom width and height. The default for video is already the Reels preset, so you can skip hunting through TikTok or wallpaper sizes.
Drag the clip inside the frame until the subject sits where you want it. Use the scale slider to punch in if a wide shot leaves the face tiny after the crop.
Preview the first second and the last second. Hooks and CTAs live at the edges of the timeline, and a crop that looks fine mid-clip often clips a chin or logo at the cut. Download MP4 when the frame is right; trim dead air in Cuts after the size is locked.
Resize by source: landscape, square, 4:5, and vertical
Landscape 16:9 or 16:10: crop a tall window — do not pad with black bars. Place eyes in the upper third and leave the bottom clear for Instagram captions.
Square 1:1: you will lose top and bottom or have to scale up. Prefer scaling until the subject fills 9:16 rather than leaving empty bands.
Portrait 4:5 feed clips: they are shorter than Reels. Scale up to fill 1080×1920, then re-check product labels and faces against the extra height. Do not letterbox 4:5 inside 9:16 for a feed post you want to look like a Reel.
Already 9:16 but the wrong pixels (720×1280, 1080×1920 off-center, or 4K vertical): set 1080×1920, reframe, and export once. Downscaling 4K to 1080 keeps more detail than stretching a 540×960 file up.
Crop, letterbox, or blur-fill
Crop is the default for Reels. Full-screen faces and products outperform a thin strip of cinema in the middle of the phone.
Letterboxing (black bars) preserves the original frame but looks like an unfinished upload. Use it only when the entire width is legally or editorially required — a wide dashboard, a scoreboard, a contract on screen.
Blur-fill is the middle path: the crop stays 9:16, and a blurred copy of the clip fills empty sides when you refuse to lose context. In Resize Video, add blur fill after you have placed the subject, not before.
Whichever fill you pick, keep burned-in text inside the safe center. Instagram’s username, caption, and audio pill cover the lower third; logos belong in an upper corner after the crop is final.
Quality checks before you upload to Instagram
Start from the highest-resolution source you have. Cropping 1080p landscape to 9:16 keeps more detail than cropping 720p, then hoping Instagram sharpens it.
Export 1080×1920 MP4 once. Do not resize, upload, download the Reel, and resize again — each hop stacks compression. If the file is too large to upload, compress after the crop, not before, so you shrink the pixels viewers will actually see.
Reuse the same preset for a series. Matching 1080×1920 and the same subject placement reads as a brand even when the topic changes.
Cross-post the same 9:16 master to TikTok and YouTube Shorts when the message matches. Bias the subject slightly off the right edge if you also publish on TikTok, where the button stack is denser.
Frequently asked questions
- How do I resize a video for Instagram Reels?
- Set the output to 1080×1920 (9:16), drag the subject into the frame, and export MP4. In Reels Editor, that is the Reels & Stories preset in Resize Video.
- What size should I resize a video for Instagram Reels?
- 1080×1920 pixels at a 9:16 aspect ratio. Stories use the same canvas.
- Can I resize a video for Instagram Reels online for free?
- Yes. Resize Video runs in the browser, keeps files on your device, and does not require an account.
- Will Instagram resize my video automatically?
- It may center-crop or letterbox landscape and square uploads. Manual resize lets you keep the face, product, or text that matters.